 NexGPU-算力租赁,GPU服务器,GPU云算力,AI服务器租用-新闻博客
When running training or inference tasks on a GPU cloud server, Jupyter Lab / Notebook is the most commonly used interactive development environment. However, launching Jupyter in the cloud differs from local development in several key ways: remote access is required, security must be considered, processes may terminate when SSH disconnects, and when billed by the hour, shutting down versus destroying has different cost implications.
This article provides the standard approach to launching Jupyter on a rented GPU instance and connecting securely, as well as how to avoid unnecessary storage costs.
Launching Jupyter: Three Essential Parameters
When launching Jupyter Lab on a cloud server, you need to add several parameters to adapt to the remote headless environment:
jupyter lab --no-browser --ip=0.0.0.0 --port=8888--no-browser: The cloud server has no graphical interface, preventing attempts to open a local browser--ip=0.0.0.0: Allows network requests from non-local loopback (by default only listens on 127.0.0.1)--port=8888: Specifies the port, default is also 8888, explicitly stated for later port forwarding
If you are logged in as root or running inside a container, you also need to add:
jupyter lab --no-browser --ip=0.0.0.0 --port=8888 --allow-rootAfter startup, the terminal will output an access link with a token, similar to:
http://127.0.0.1:8888/lab?token=abc123def456...This token is the credential for first login, so save it.
If You Don't Have an Environment Yet
When renting a GPU cloud server for the first time, configuring Python, CUDA, and PyTorch from scratch can be error-prone (driver version mismatches, long compilation times). You can directly choose a pre-installed image template with dependencies already set up, including Jupyter and common frameworks, ready to use out of the box. NexGPU's image template page lists one-click deployment options for scenarios like PyTorch, TensorFlow, and ComfyUI; just choose based on the task you want to run.
Connection Method: SSH Tunnel is Safer Than Public Internet
After starting Jupyter, there are two ways to access it:
- Direct public access: Open port 8888 in the cloud server security group, enter
http://<服务器公网IP>:8888in the browser - SSH port forwarding: Jupyter only listens on local loopback, and the remote port is mapped to local via SSH tunnel
The problem with direct public access is that the port is exposed to the internet. Even with token protection, it can be easily discovered by port scanners and subjected to brute-force attacks. Additionally, you need to configure security group rules, adding an extra layer of operation.
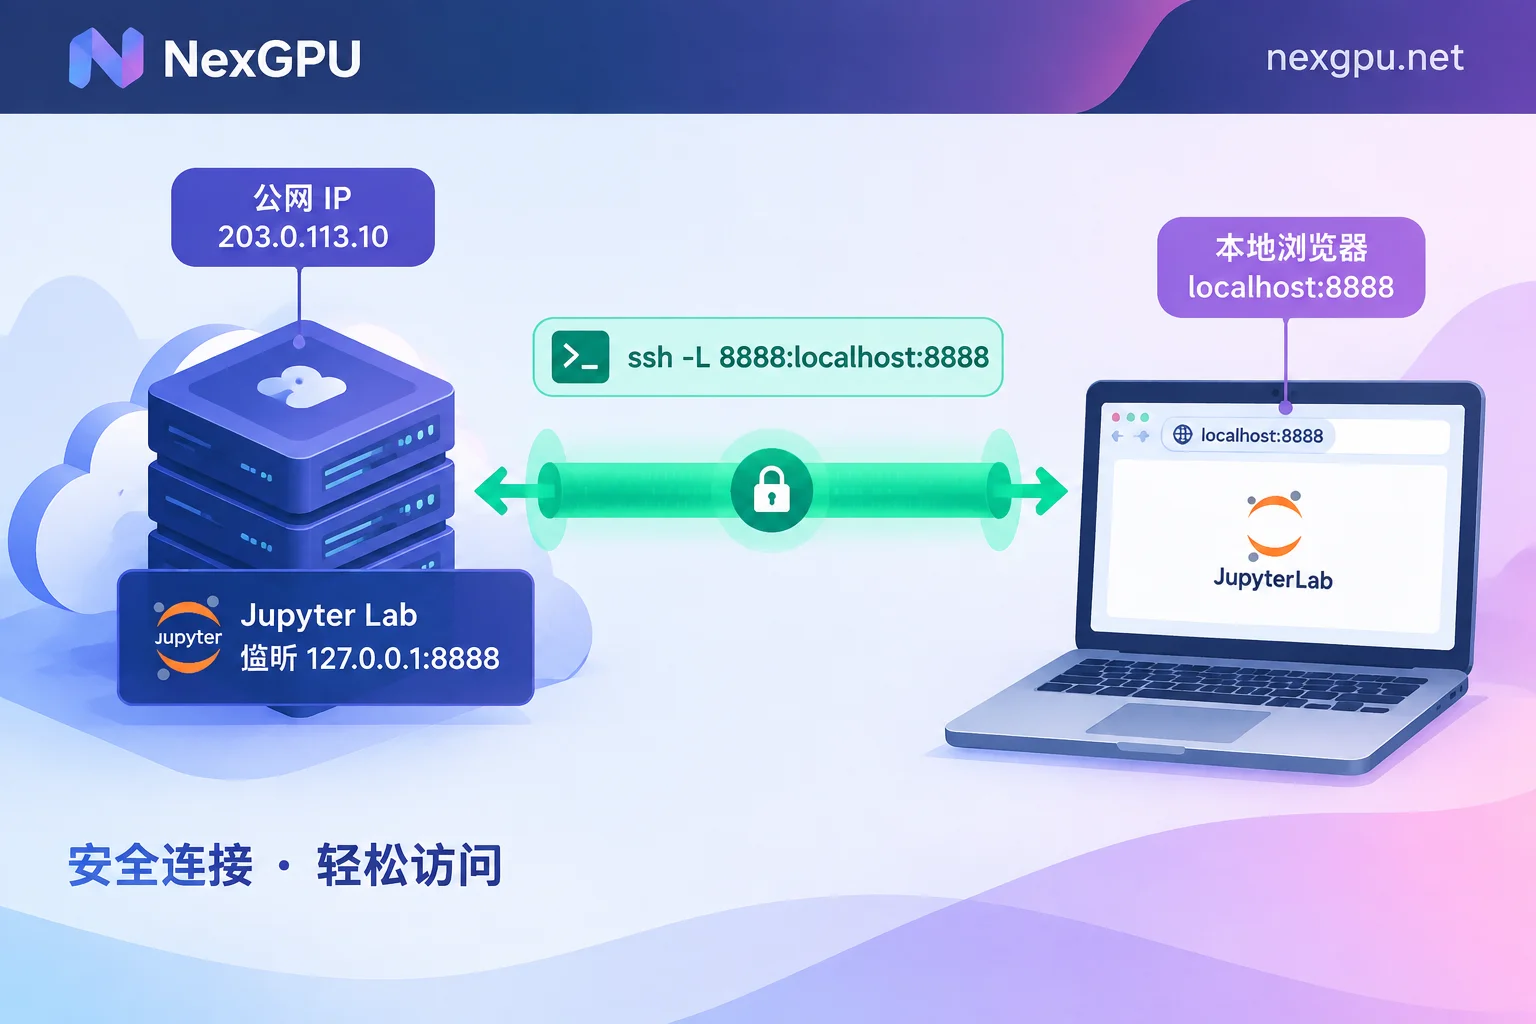
The recommended approach is SSH local port forwarding, which is both secure and convenient.
Specific Steps
1. Start Jupyter on the cloud server, listening on local loopback
jupyter lab --no-browser --port=8888Note that --ip=0.0.0.0 is not needed here; the default listening on 127.0.0.1 is sufficient, and it cannot be accessed directly from outside.
2. Establish an SSH tunnel in the local terminal
Open a new local terminal window (do not close the one running Jupyter) and execute:
ssh -N -L 8888:localhost:8888 user@server_ip-N: Do not execute remote commands, only do port forwarding-L 8888:localhost:8888: Map remote port 8888 to local port 8888user@server_ip: Replace with your cloud server login user and public IP
If the cloud server SSH port is not the default 22, add the -p parameter:
ssh -N -L 8888:localhost:8888 -p 2222 user@server_ipAfter the tunnel is established, this terminal will hang (no output is normal); do not close it.
3. Access from local browser
Open your browser and visit http://localhost:8888, paste the token output when starting Jupyter, and you can log in.
In this way, data flows entirely through the SSH encrypted channel, the external world cannot directly access the cloud server's port 8888, and you don't need to modify security group rules.
If local port 8888 is already occupied, you can map to another port, for example local 8889:
ssh -N -L 8889:localhost:8888 user@server_ipThen visit http://localhost:8889.
Keep Running in Background: Tasks Continue When SSH Disconnects
The above startup method has a problem: once you close the SSH terminal (or the network jitters and disconnects), the Jupyter process will be terminated, and any running training or inference tasks will be interrupted.
When running long tasks, you need tools to keep Jupyter running persistently in the background.
Option 1: tmux Session Management
tmux is a terminal multiplexer that can create independent sessions that continue running in the background after SSH disconnects.
Install tmux (most cloud images have it pre-installed):
# Ubuntu/Debian
sudo apt install tmux

# CentOS/RHEL
sudo yum install tmux
Usage flow:
- After SSH login to the cloud server, create a new session:
tmux new -s jupyter- Start Jupyter in the tmux session:
jupyter lab --no-browser --port=8888- Press
Ctrl+BthenDto detach from the session without terminating it; Jupyter continues running in the background - After closing SSH or logging in again, use this command to resume the session:
tmux attach -t jupyterYou will see the Jupyter logs again. To view all sessions: tmux ls.
Option 2: nohup Background Startup
If you don't want to use tmux, you can use nohup to put Jupyter in the background:
nohup jupyter lab --no-browser --port=8888 > jupyter.log 2>&1 &nohup: Ignore hangup signal, continue running after SSH disconnects> jupyter.log 2>&1: Redirect output and errors to a log file&: Run in the background
After startup, it returns the process ID. You can view the log with tail -f jupyter.log to find the token.
To stop Jupyter, first find the process ID:
ps aux | grep jupyterThen kill the corresponding PID:
kill <PID>Cost Boundaries: Difference Between Shutdown and Destroy
On GPU cloud services billed by the hour, understanding the instance lifecycle is important for controlling costs.
Taking NexGPU as an example, there are only three billing items: compute, storage, and traffic. The key difference is:
- Shutdown (Stop): Stops compute billing, but storage fees continue, because your system disk, code, and model weight files are retained, and you can continue using them after booting up next time
- Destroy (Destroy): Completely deletes the instance and all data, stops all charges
Actual usage strategies:
Short-term interruption: For example, if you don't run tasks at night but will continue tomorrow, choose shutdown. After booting up the next day, Jupyter Notebook, virtual environment, and downloaded datasets are still there, and you can continue with tmux attach or restart Jupyter. Storage fees are charged by the hour; a system disk of tens of GB costs only a few cents to one or two yuan per day.
Task completion: After model training is done and weight files have been downloaded locally, if you won't use this instance again in the short term, destroy it. If you just shut down, storage fees will continue to accrue, and over several days they might exceed the compute costs.
Save your work: Before destroying, remember to back up:
- Jupyter Notebook files (.ipynb)
- Trained model weights
- Custom configuration files
You can use scp or rsync to download from the cloud to local, or upload to object storage. When renting a new instance next time, upload them back or pull from object storage.
NexGPU's bill can be viewed in real-time in the console, with compute and storage listed separately, so you can clearly see storage fees running after shutdown. If you're not sure how long you'll rent, you can first check the unit price on the pricing page and estimate costs based on your storage volume.
Frequently Asked Questions
Q: After establishing SSH tunnel, browser cannot access localhost:8888
Check:
- Whether Jupyter started normally (no error exit)
- Whether the port number in the SSH tunnel command matches the Jupyter startup port
- Whether local port 8888 is occupied by another program (try a different port)
- Whether the SSH tunnel is disconnected (re-execute the
ssh -N -Lcommand)
Q: What if I lost the token?
In the terminal or tmux session running Jupyter, press Ctrl+C to stop Jupyter, and restarting will generate a new token. Or use this command to list all current tokens:
jupyter server listQ: Can I set a password instead of a token?
Yes. After the first launch, you can configure a password in Jupyter's settings. Or generate a password hash via the command line:
jupyter lab passwordEnter the password as prompted, and you can log in with the password next time. However, the SSH tunnel itself is already very secure, and the token is sufficient.
Q: Can multiple Jupyter instances run simultaneously?
Yes, just specify different ports:
# 第一个实例
jupyter lab --no-browser --port=8888

# 第二个实例
jupyter lab --no-browser --port=8889
Create two tunnels locally, mapping to different ports.
Summary of operation sequence: Choose an image and start an instance → SSH login → create a new tmux session → start Jupyter → establish SSH tunnel locally → access localhost in browser and paste token → download results after task completion → destroy instance to stop all charges. SSH port forwarding eliminates the need for security group configuration, tmux ensures that disconnection doesn't affect tasks, and distinguishing between shutdown and destroy helps control costs.




Comments(0)