 NexGPU-算力租赁,GPU服务器,GPU云算力,AI服务器租用-新闻博客
Let's start with the conclusions, so you can jump directly to your tier:
- 16GB VRAM: Use FP8 for the main model and an fp8 version for the text encoder. At 1024×1024, the full pipeline runs smoothly with minimal quality loss.
- 10–12GB: Use a GGUF Q5_K_M or Q4_K_S main model + fp8 T5, along with ComfyUI's low-VRAM mode.
- 8GB: GGUF Q4 + fp8 T5 + CPU offloading. It works, but expect to wait.
- 6GB: Only viable with layer-by-layer offloading, and the speed drops to a point where you'll give up.
- 24GB and above: You can run without quantization; just handle the VRAM spike during decoding.
Below, I'll explain exactly what each step changes and what it costs.
Where Does VRAM Actually Go: Three Main Components
FLUX.1's dev and schnell share the same architecture: a DiT diffusion backbone with ~12B parameters, plus a T5-XXL text encoder with ~4.7B parameters, along with a CLIP ViT-L and a VAE decoder.
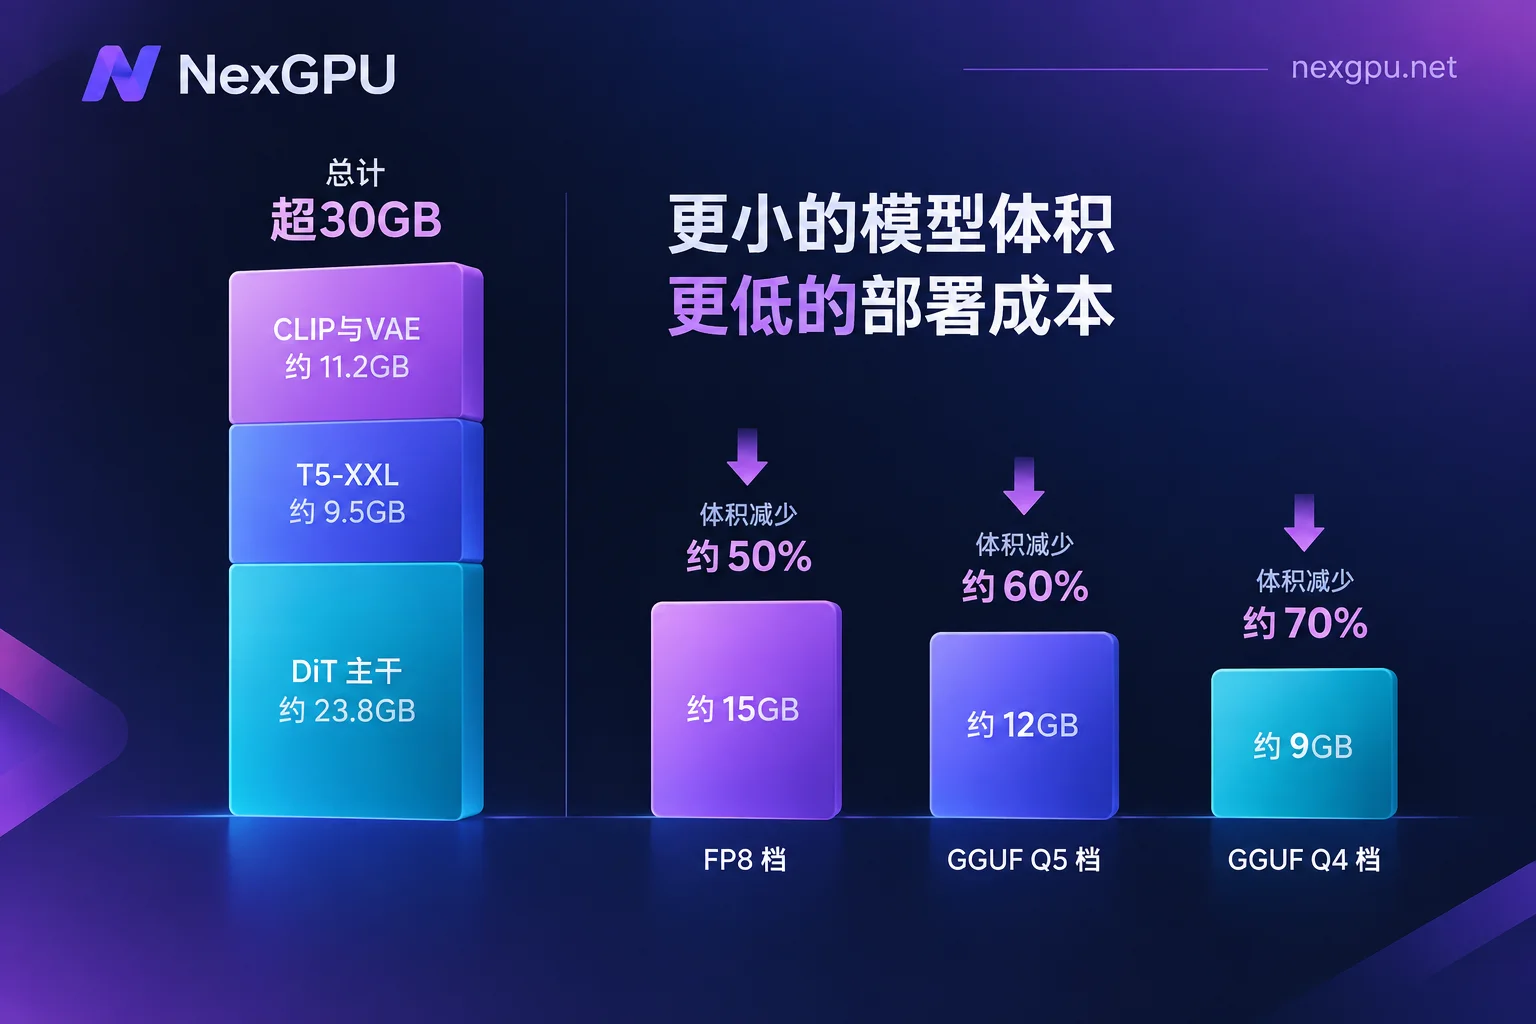
At FP16 precision, the backbone alone takes about 23.8GB, and T5-XXL takes about 9.5GB, totaling over 33GB. This is why even a 24GB consumer flagship card can hit or exceed the limit with default full precision and all modules resident in VRAM, while 8GB and 12GB cards can't even load the model and immediately report CUDA Out of Memory.
Understanding this structure is crucial: all methods to lower the barrier essentially fall into two categories—either compress the weights (quantization) or avoid having them all in VRAM at once (offloading). A third category deals with the transient spike during VAE decoding at the end of generation. These three approaches can be combined, each with different trade-offs.
Method 1: Quantize the Backbone and Text Encoder
This is the most direct step and should be done first.
FP8 tier (suitable for 16GB). Replace the backbone with FP8 weights (common filename like flux1-dev-fp8.safetensors), reducing size from 23.8GB to about 11.9GB. On cards like RTX 4080 or RTX 4060 Ti 16GB, paired with an fp8 text encoder, you can run full 1024×1024 generation, with quality loss barely noticeable to the naked eye. If you have a 16GB card, prioritize this path and don't rush to more aggressive quantization.
GGUF tier (suitable for 8–12GB). On the ComfyUI side, use city96's ComfyUI-GGUF plugin to load a Q4_K_S or Q5_K_M backbone, compressing weights to the 6–8GB range. Q5_K_M offers more stable quality, while Q4_K_S is more memory-efficient. For 12GB cards, try Q5_K_M first; for 8GB cards, you'll usually need to drop to Q4.
Don't forget the text encoder. Many people only quantize the backbone and still get OOM because T5-XXL's 9.5GB is untouched. Swap it for t5xxl_fp8_e4m3fn, which saves about half. The combination of a GGUF backbone + fp8 T5 is the standard recipe for running FLUX on an 8GB card.
NF4 route. bitsandbytes' 4-bit (NF4) quantization is another option, similar to GGUF in that it compresses weights to 4-bit. The choice mainly depends on which loading method your frontend supports best; you don't need to try both.
The cost of quantization is a slight degradation in image quality and detail, more noticeable with aggressive quantization, especially in text rendering, fine textures, and hands—areas that are already challenging. If you're producing commercial images, it's advisable to compare a few outputs with the same seed and prompt between FP8 and Q4 before deciding.
For a more systematic breakdown of how much VRAM each precision tier saves, see this article: How Much Does FP8 vs INT4 Quantization Affect GPU VRAM? 4 Calculations Separated.
Method 2: Offload Unused Modules to System Memory
If quantization alone isn't enough, offloading comes next. The core idea: the text encoder is only used at the beginning, and the VAE only at the end—they don't need to occupy VRAM throughout.
ComfyUI side: By default, it streams loading. When VRAM is tight, you can add the --lowvram startup parameter to let the model load into VRAM in chunks on demand.
On the Diffusers code side, two functions have different strengths—don't mix them up:
# 模块级卸载:文本编码器、VAE 用完就退回内存,推荐先用这个
pipe.enable_model_cpu_offload()

# 子模块逐层卸载:更省,6GB 显存也能跑起来,但明显更慢
pipe.enable_sequential_cpu_offload()
enable_model_cpu_offload() is the most cost-effective choice, with acceptable speed loss. enable_sequential_cpu_offload() is the last resort; it repeatedly moves weights layer by layer between system memory and VRAM, passing through PCIe for every denoising step, causing an order-of-magnitude slowdown. Can a 6GB card run FLUX? Yes, but you have to ask yourself if you're willing to wait that long for one image.
Note that these two functions must be called before manually moving the pipeline to .to("cuda"), otherwise they conflict.
Method 3: Solve the VAE Decoding Spike
A common phenomenon: the denoising process runs fine, the progress bar completes, and then OOM occurs in the last second. The problem is VAE decoding—it needs to restore the latent to a full pixel image in one go, causing a sudden spike in VRAM usage at 1024×1024 and above.
In Diffusers, adding two lines bypasses this:
pipe.vae.enable_tiling()
pipe.vae.enable_slicing()
Tiled decoding and stitching avoids the transient peak. The trade-off is that at very high resolutions, you might see slight seams at the stitching edges, but for everyday images, it's imperceptible.
If you're getting other errors, you can refer to this for troubleshooting order: GPU Out of Memory Solutions: 5-Step Diagnosis.
Method 4: Switch to schnell—Saves Time, Not VRAM
This point is easily misunderstood. FLUX.1 [schnell] and dev have the same architecture and parameter count, so their VRAM usage is the same; switching won't make an OOM machine suddenly work.
schnell's value is time. It's distilled over timesteps, generating images in 1–4 steps, whereas dev typically needs 20–50 steps. When you've already enabled quantization and offloading, making each step slow, reducing steps by 4–7 times gives a very noticeable improvement. Also, schnell's guidance_scale is fixed at 0, so it doesn't use CFG adjustment—if your workflow relies on fine guidance control, you'll need to stay with dev.
So the order is: first use quantization and offloading to solve "can it run", then use schnell to solve "how long to wait".
The Hidden Costs of Lowering the Barrier Locally: RAM and PCIe
This section deserves its own mention because it's the real reason many people spend all day tweaking and still fail.
Quantization and CPU offloading don't eliminate the burden—they shift VRAM pressure to system memory and PCIe bandwidth. If your system RAM is under 32GB (32–64GB recommended), the system starts paging to disk, causing the whole machine to freeze, fans spinning at max, and per-image time ballooning by tens of times. You might think the GPU is inadequate, but it's actually RAM.
Similarly, if the GPU runs on PCIe x4 or an older slot, the overhead of layer-by-layer offloading is further amplified.
Therefore, the complete prerequisites for a local setup are: sufficient system RAM + decent PCIe bandwidth + the debugging time you're willing to spend. If any one is missing, the benefits of tweaking quickly drop to zero.
When to Stop Tweaking and Just Get More VRAM
The criteria are practical: if any of the following apply, further optimization isn't worth it:
- You've already compressed to Q4, and image quality is affecting deliverables;
- A single image takes several minutes, but you need to iterate prompts frequently;
- You want to run LoRA training, ControlNet stacking, batch generation, or higher resolutions—these add VRAM on top of the inference baseline;
- Your system RAM is already insufficient, and upgrading RAM costs about the same as a period of cloud compute.
The degrees of freedom by VRAM tier are roughly: 24GB (e.g., RTX 3090, RTX 4090) can run the full pipeline without quantization or with light FP8, and with VAE tiling it's smooth; 48GB (e.g., L40S, A6000) can keep DiT, T5, and VAE resident at original precision, eliminating offloading bottlenecks and leaving room for LoRA training and parallel workflows.
If you really want to move to the cloud, the easy way is to use a ready-made ComfyUI image and boot up, rather than installing drivers, dependencies, and downloading models from a bare system—that time cost often outweighs the compute itself. In NexGPU's image templates, you can find one-click deployment environments like ComfyUI and PyTorch; if you're unsure which GPU fits your workflow, check out the model-based GPU selection guide.
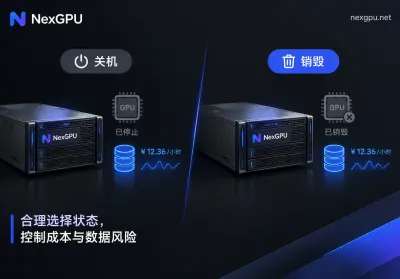
A few billing boundaries to know before you start: Billing is per hour, measured per second, with no minimum spend or contract; the bill has only three items: compute, storage, and traffic; after shutdown, compute charges stop, but storage continues to bill, and only destroying the instance stops everything—meaning if you plan to continue tweaking the next day, keeping the environment after shutdown is reasonable, but for long-term disuse, export model weights and destroy. The unit price at order time is locked until instance destruction. You can verify these details on the pricing page against available nodes.
A practical approach: first use the quantized version locally to fine-tune prompts and workflows, then when you need high-quality outputs, batch rendering, or LoRA training, spin up a cloud instance with large VRAM to run a batch, export the results, and destroy it. This way, you avoid local quality compromises and don't burn money on idle machines.
If you want to see the full cloud deployment steps, continue reading: Flux.1 Model Cloud GPU Deployment Tutorial: How Much VRAM Do You Need?



Comments(0)