 NexGPU-算力租赁,GPU服务器,GPU云算力,AI服务器租用-新闻博客
Here's the conclusion up front: on a rented GPU instance, your models, datasets, and generated outputs live only on that instance's disk by default. Stopping the instance keeps the disk but releases compute—your files, environment, and dependencies you spent ages installing are all still there, at the cost of continuing storage fees based on capacity. Destroying the instance is a full stop: compute, storage, and traffic all stop, and the disk is completely wiped with no recovery.
So the only real thing you need to do to "save data" is: before destroying, move anything you need long-term off the instance. Move it, then destroy—that's when the bill goes to zero.
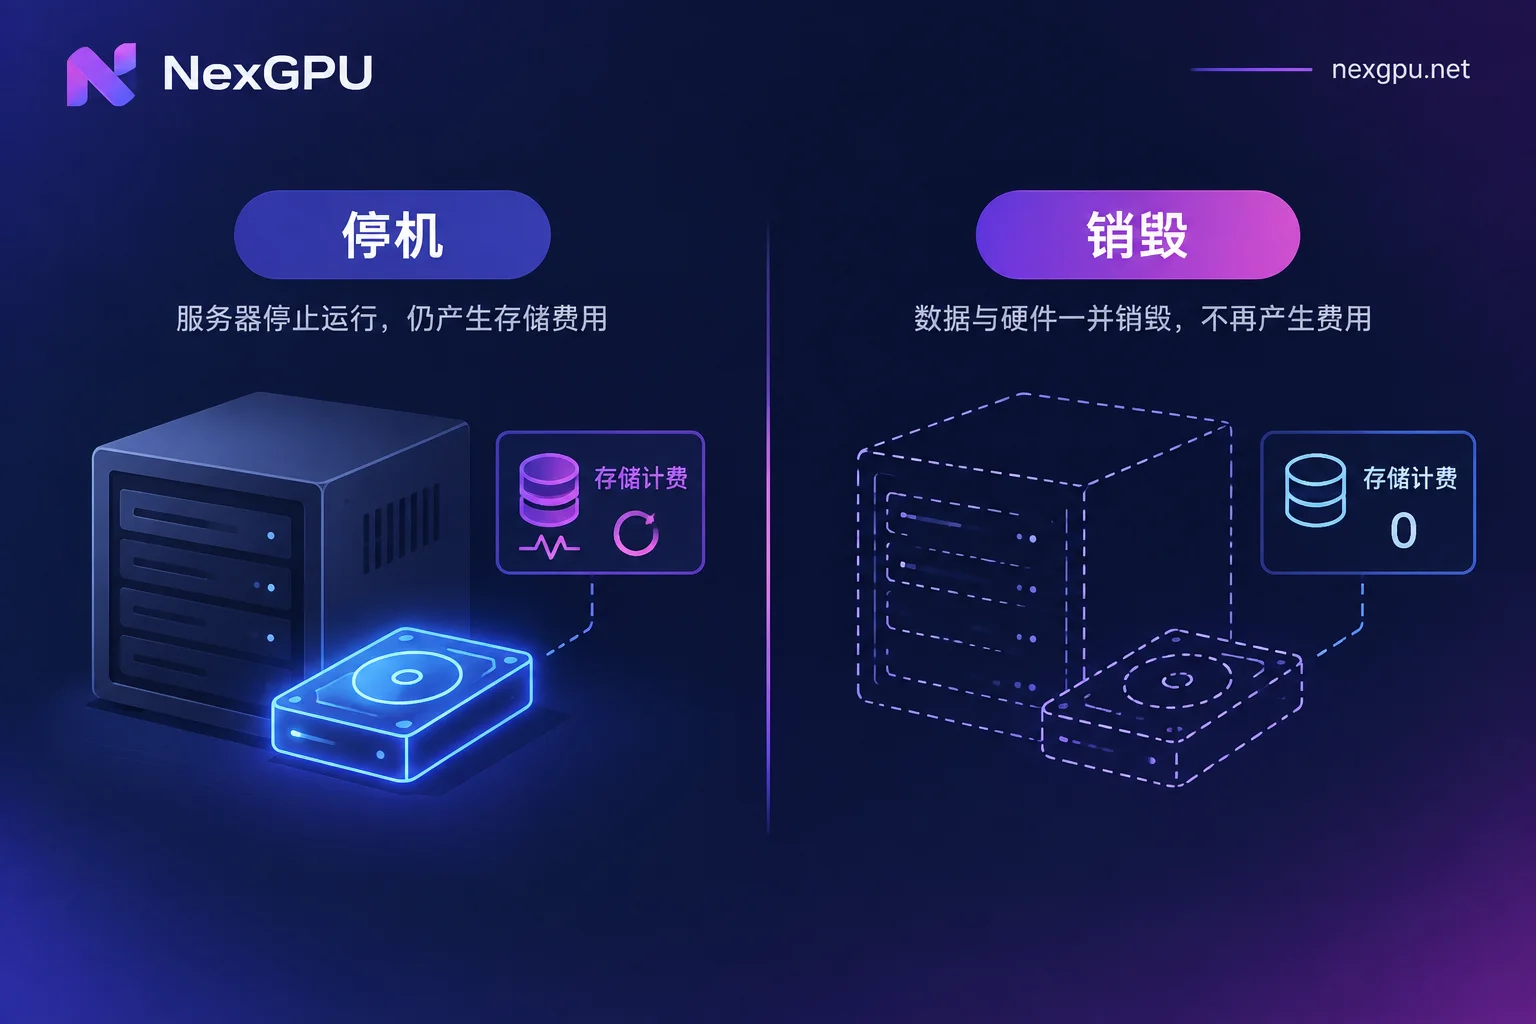
First decide whether you still need this instance
This decision determines whether you should stop or destroy:
- You'll continue tuning tomorrow and don't want to reinstall the environment and dependencies—stop. Files are all there, next boot you continue directly, but storage fees keep accruing during the stop.
- The task is done, or you won't touch it for days—move the results off, then destroy. This is the default after a task finishes.
- Not sure—move the data first, then decide between stop and destroy. Moving is reversible; destroying is not.
One easily overlooked factor: on NexGPU, the unit price at order time is locked until you destroy the instance. If you rented a machine at a good rate, destroying and reordering means paying the then-current price. Whether to destroy a long-running instance should factor this in along with storage fees; billing details are in the Billing and Rules page.
Which directory should files go in
Many people lose data not because they forgot to back up, but because they wrote to the wrong location from the start.
In containerized or virtualized GPU instances, /tmp and non-persistent container temporary layers may be cleared after a restart, rebuild, or image update. Don't put critical outputs in these paths—write them to the data disk mount point or main working directory allocated to you.
Before starting, do a check and explicitly point these paths to the data disk:
output_dir/logging_dir/ checkpoint save directory in your training script- ComfyUI's
outputandmodelsdirectories, Stable Diffusion output paths - Hugging Face cache (
HF_HOMEorHF_HUB_CACHE)—weights are often tens of GB, and putting them in the wrong place wastes temporary layer space and may cause re-downloads - The landing directory after extracting datasets
Actual mount points and data disk capacity depend on what the console shows; they can differ by machine type and image. When choosing an image, confirm the working directory convention—it saves a lot of trouble later. See How to Choose Cloud GPU Image Templates.
Three routes to move data off the instance
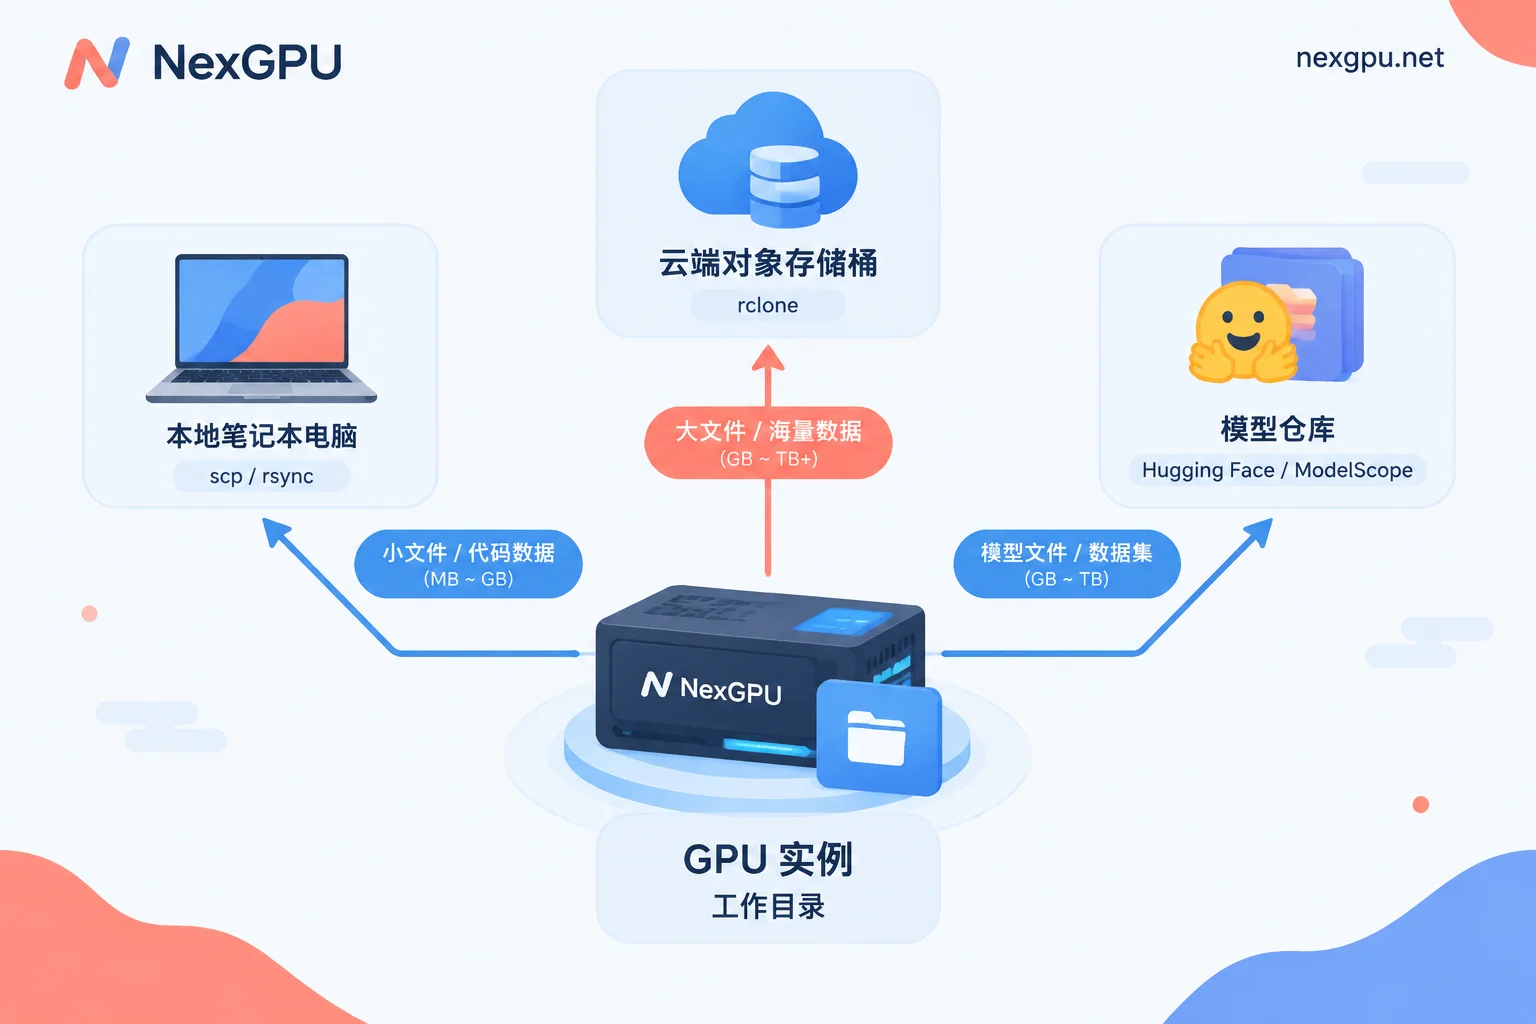
Route 1: Pull directly to local (a few hundred MB to a few GB of results)
Suitable for images, short videos, logs, code, and small fine-tuned weights.
Using standard SSH channels with scp or rsync is enough:
# 单个目录整体拉回
scp -P <端口> -r root@<实例地址>:/workspace/outputs ./outputs

# 大文件或断点续传用 rsync,中断后重跑会接着传
rsync -avP -e "ssh -p <端口>" root@<实例地址>:/workspace/outputs/ ./outputs/
rsync -P's resume capability is far more useful than scp on unstable networks. If you don't want to touch the command line, you can also package directories into tar/zip in the Web console's JupyterLab or file manager, then right-click to download—but browser downloads of large files tend to interrupt; for anything over a few GB, use rsync.
If SSH connection, ports, and keys aren't set up yet, see How to Connect to a Rented GPU via SSH.
Route 2: Sync to object storage (large weights, datasets, long-term archives)
Model checkpoints and datasets of tens or hundreds of GB are slow and bandwidth-heavy to move to local. A more convenient approach is to set up an object storage client on the instance and sync data to S3-compatible storage (AWS S3, Cloudflare R2, Wasabi, self-hosted MinIO, etc.).
rclone is the most universal tool here:
# 交互式配置一个 remote,选 S3 及对应的 provider
rclone config

# 首次上传:只增不删,最安全
rclone copy /workspace/outputs myremote:my-bucket/exp-01 -P

# 后续增量:sync 会让目标端与源端一致,注意它会删除目标端多出来的文件
rclone sync /workspace/checkpoints myremote:my-bucket/ckpt -P
The difference between copy and sync is worth remembering: sync is one-way mirroring—files deleted at the source are also deleted at the destination. For first uploads and when unsure, use copy; once the directory structure is stable, use sync for incremental sync.
The benefit of this route is that data and instance lifecycles are completely decoupled: destroying the machine, changing GPUs, or switching regions doesn't affect the archive. Next time you spin up a new instance, one rclone copy command pulls the weights and datasets back—no need to keep an idle instance stopped and paying storage fees just to keep files.
Route 3: Push to a model repository (fine-tuned weights)
If the output is a set of model weights you want to reuse or publish, pushing to a model community host is easier than managing files yourself:
# Hugging Face,私有仓库加 --private
huggingface-cli login
huggingface-cli upload <用户名>/<仓库名> ./output_model --repo-type model
ModelScope also provides corresponding SDK upload methods. Private repositories work too, suitable for sharing weights within a team without using your instance storage.
Don't wait until a long task finishes to remember saving
When training runs for dozens of hours, the risk isn't destruction—it's crashing midway. A sensible approach is to have checkpoints saved to disk periodically and also synced off the instance periodically:
# 每 30 分钟把最新 checkpoint 增量推到对象存储
while true; do rclone copy /workspace/checkpoints myremote:my-bucket/ckpt -P; sleep 1800; done
Run it in the background with tmux or nohup. For more on interrupt recovery and checkpoint parameters, see Cloud GPU Long Task Interrupt Recovery and Checkpoint Setup.
Moving data itself incurs costs
NexGPU's bill has only three items: compute, storage, and traffic. Data transfer falls under traffic, so the way you move data directly affects the bill:
- During stop: compute billing stops, storage fees continue based on the retained disk capacity. If you leave it stopped long-term without use, costs slowly accumulate and become uneconomical.
- After destroy: all three stop, and disk data is wiped simultaneously.
- Transferring large files: counts toward traffic. So before moving, it's worth cleaning up on the instance first—delete original compressed packages before dataset extraction, intermediate artifacts, useless early checkpoints, then package and transfer, rather than moving the entire disk as-is.
Also, whether different machine types provide local instance disks or independently mountable persistent data volumes, and whether the console allows creating and detaching storage volumes separately, depends on what your console shows at order time. When choosing GPUs and images, glance at the storage configuration—you can pick a template by task on the Image Templates page before booting.
Go through these five checks before destroying
- Does the number and size of files in the output directory match your expectations? (Take a look with
du -sh—don't just check filenames) - Are the final weights / images / logs all off the instance and verified at the destination? A transfer command returning 0 doesn't mean files are complete—spot-check sizes or checksums.
- Have you also saved your modified config files, startup scripts, and requirements? These are easier to miss than weights when reinstalling the environment.
- Have running services like databases and vector stores been properly stopped and exported?
- If you confirm you'll keep using this machine, stop rather than destroy—the two buttons have completely different consequences.
After these steps, click destroy, and compute, storage, and traffic will truly stop. If you're still choosing a machine type or preparing to launch the next one, check the Pricing and Available Nodes page to see what GPUs are currently available.


Comments(0)